App Deployment Guide
Overview
Kovra Cloud supports two methods for deploying applications: from a pre-built template or from an existing Git repository. Both methods result in a fully managed deployment with automatic TLS, health checks, and monitoring.
Creating an App from Template
Templates provide a pre-configured project scaffold. Kovra Cloud creates a new Git repository in your connected provider and deploys it automatically.
Available Templates
| Template | Language/Framework | Description |
|---|---|---|
| Go Backend | Go | REST API backend with Fiber |
| Java Backend | Java | Spring Boot backend |
| Next.js Frontend | TypeScript | Next.js frontend application |
| Fullstack | TypeScript + Go | Full-stack application |
Steps
- Navigate to Apps > Create Application
- Select Kovra Cloud as the deploy target
- Select From Template
- Choose a template from the grid
- Select your GitHub or GitLab integration (add one at Settings > Integrations if needed)
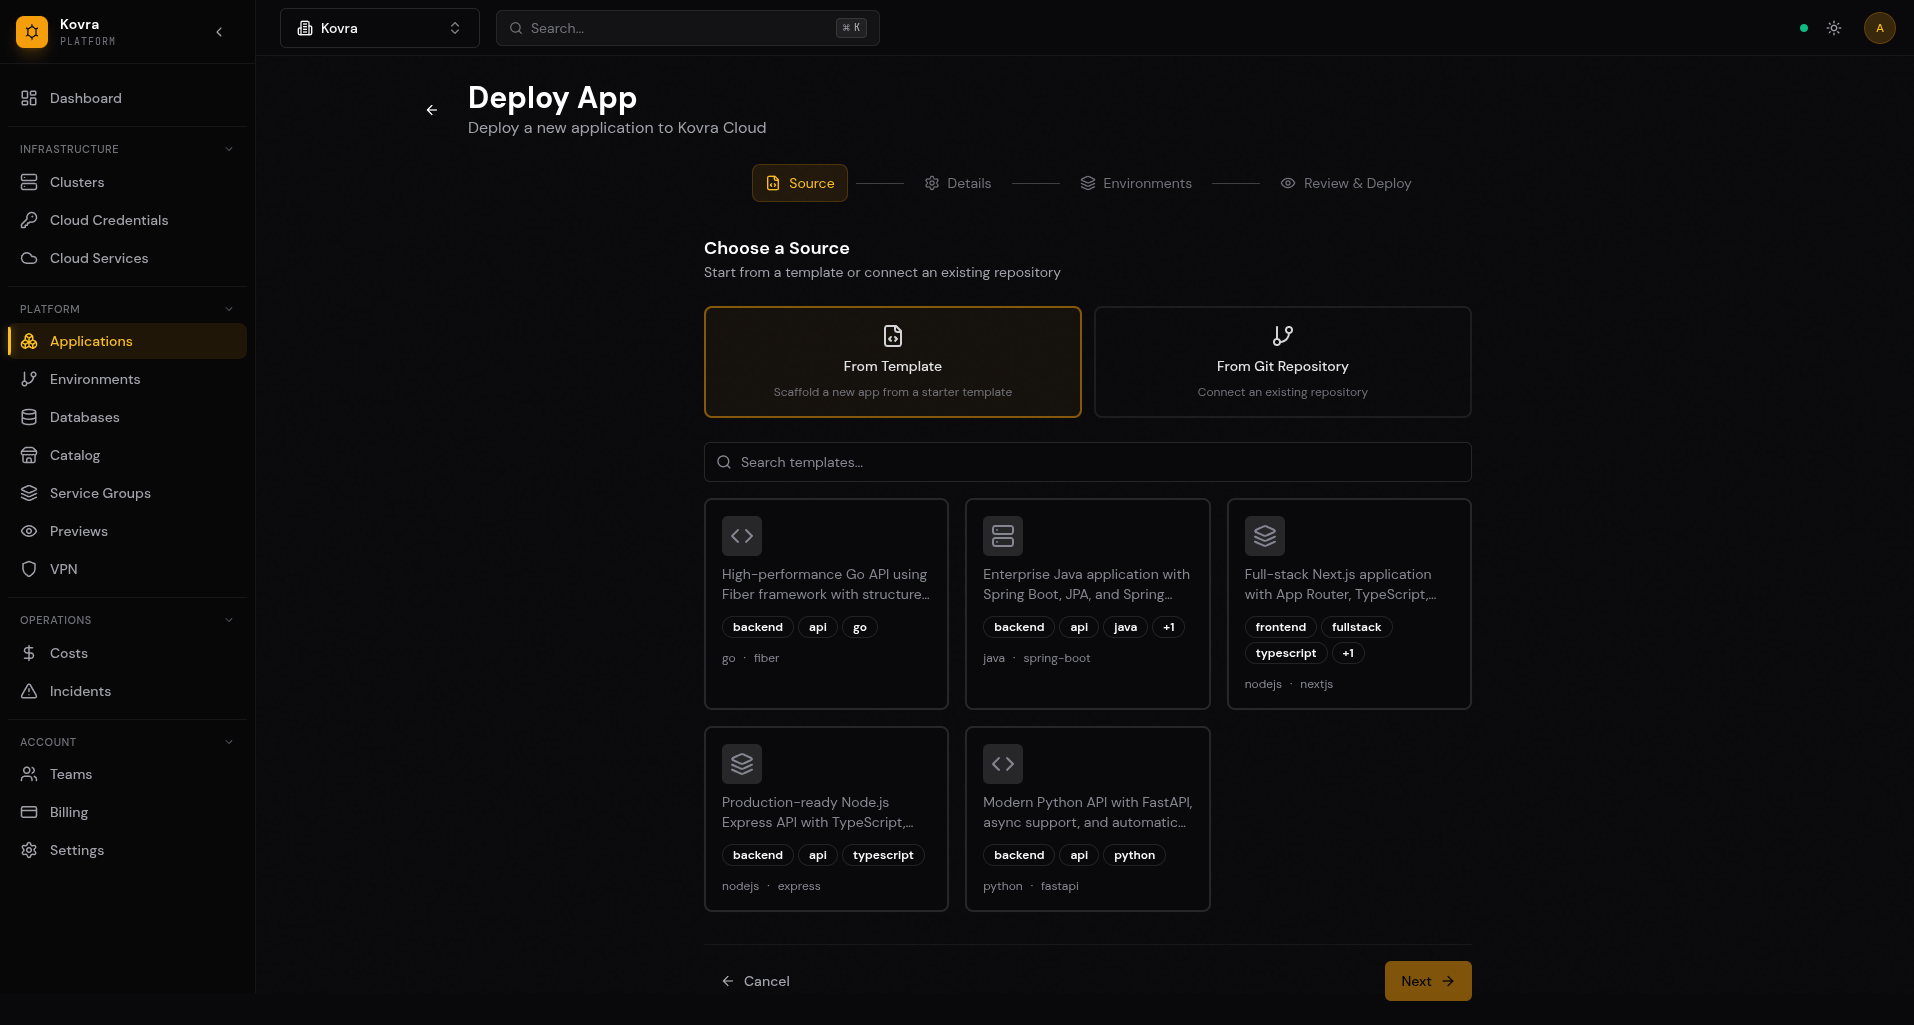
- Enter the application details:
- Name — Lowercase alphanumeric with hyphens (used as the deployment identifier)
- Display Name — Human-readable name shown in the dashboard
- Description — Optional description
- Team — Optional team assignment
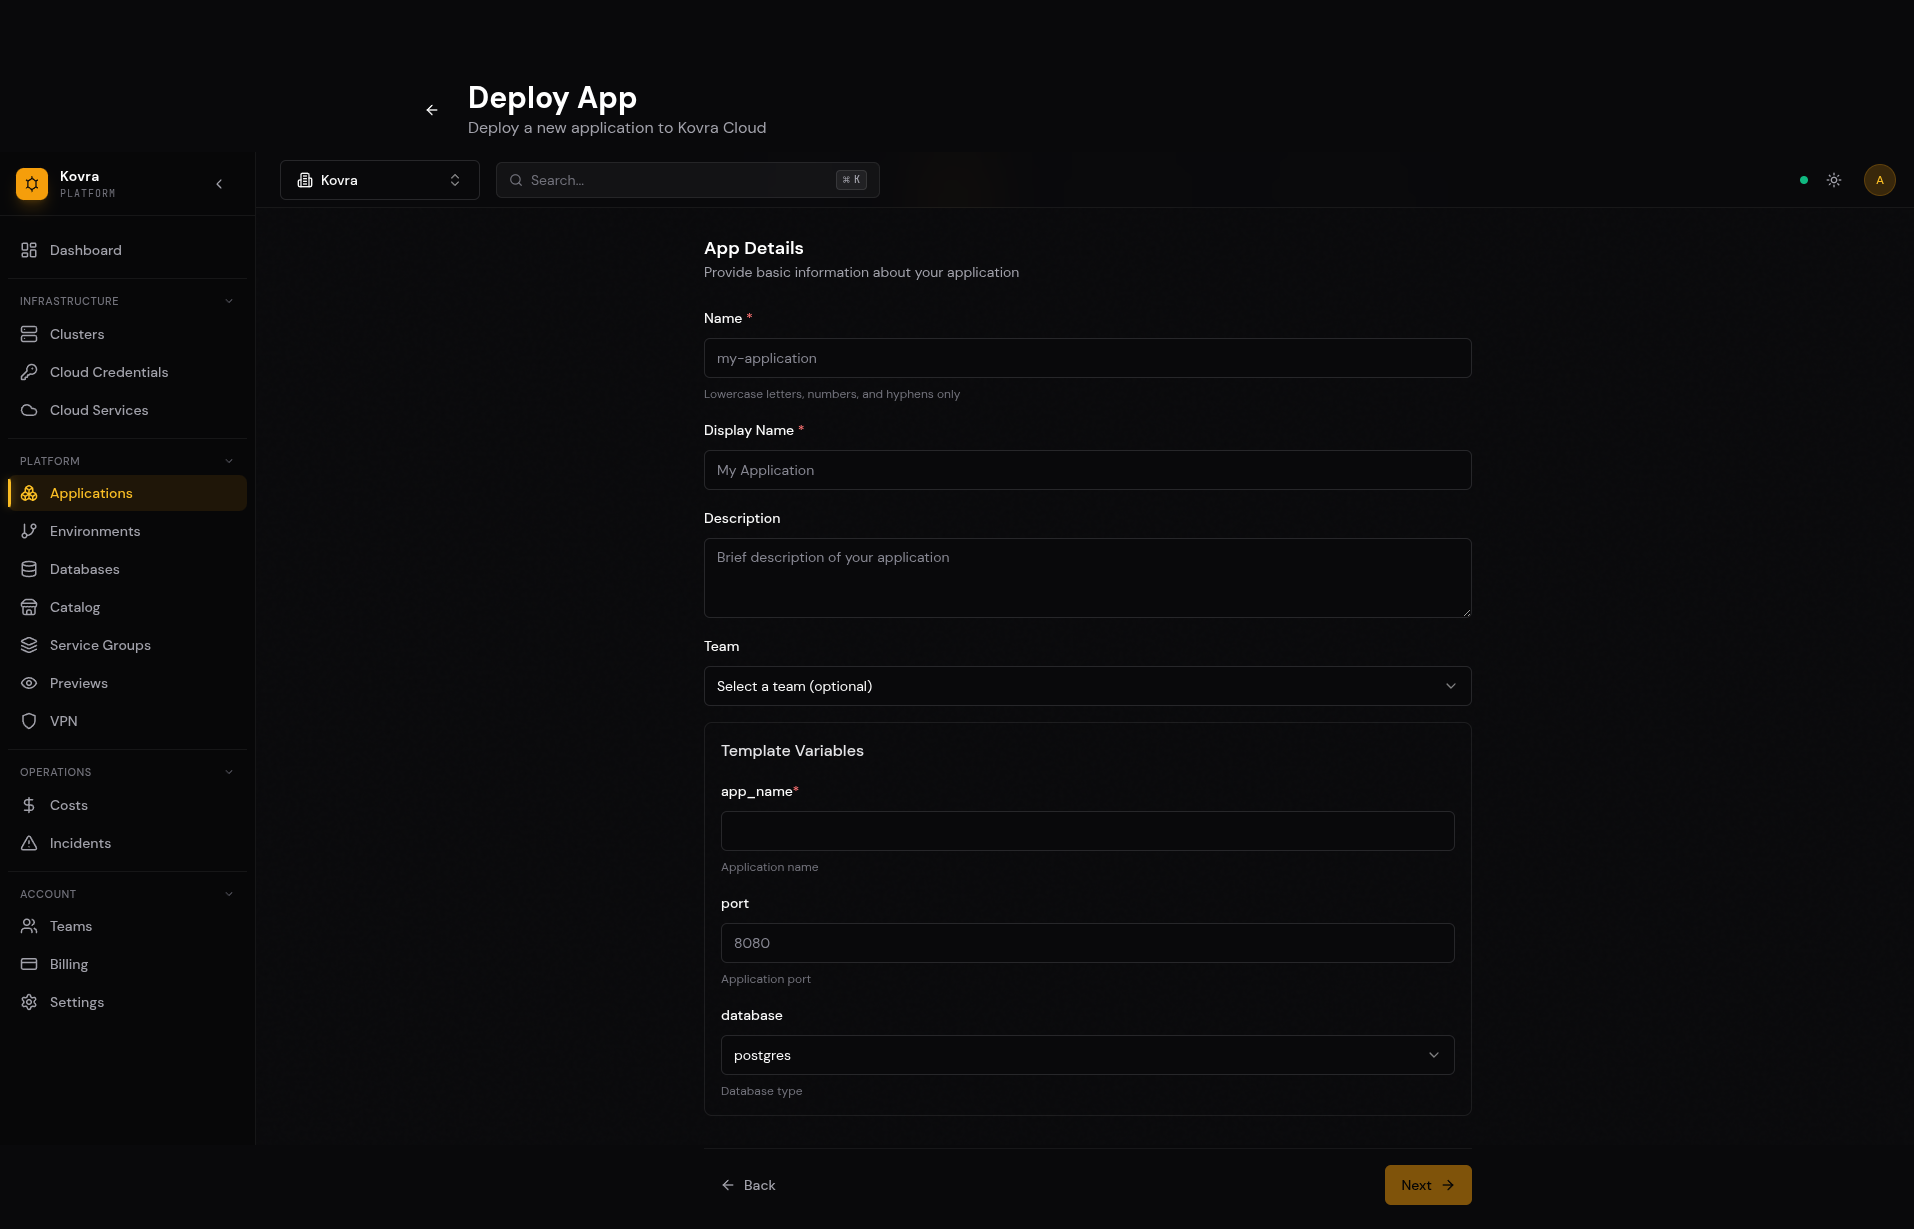
- Review and confirm
Creating an App from Git Repository
Deploy an existing application from a repository you have already imported.
Steps
- Navigate to Apps > Create Application
- Select Kovra Cloud as the deploy target
- Select From Git Repository
- Select your GitHub or GitLab integration
- Choose a repository from the list
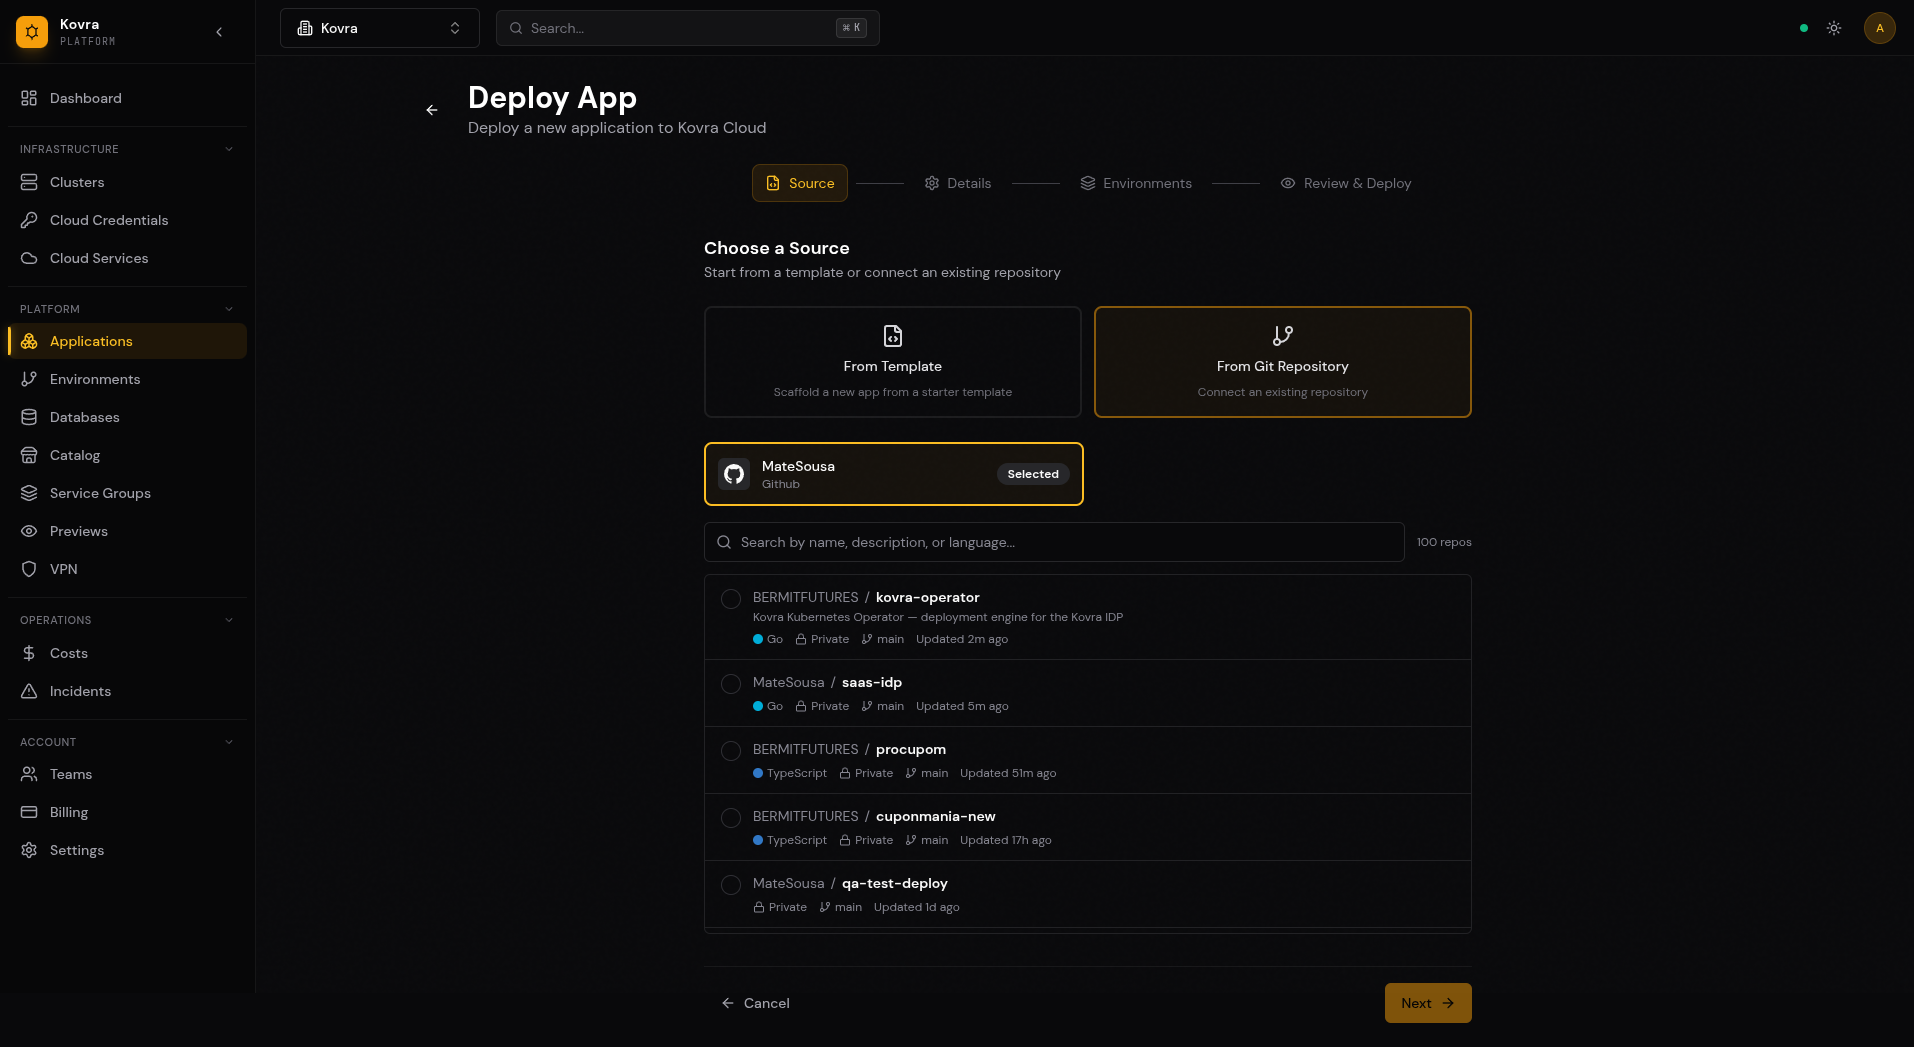
- Enter application details (name, display name, description, team)
- Review and confirm
Importing Repositories
Before creating an app from a repository, you must import it:
- Connect a Git integration (GitHub or GitLab) at Settings > Integrations
- Navigate to Repositories
- Click Import and select repositories from your connected providers
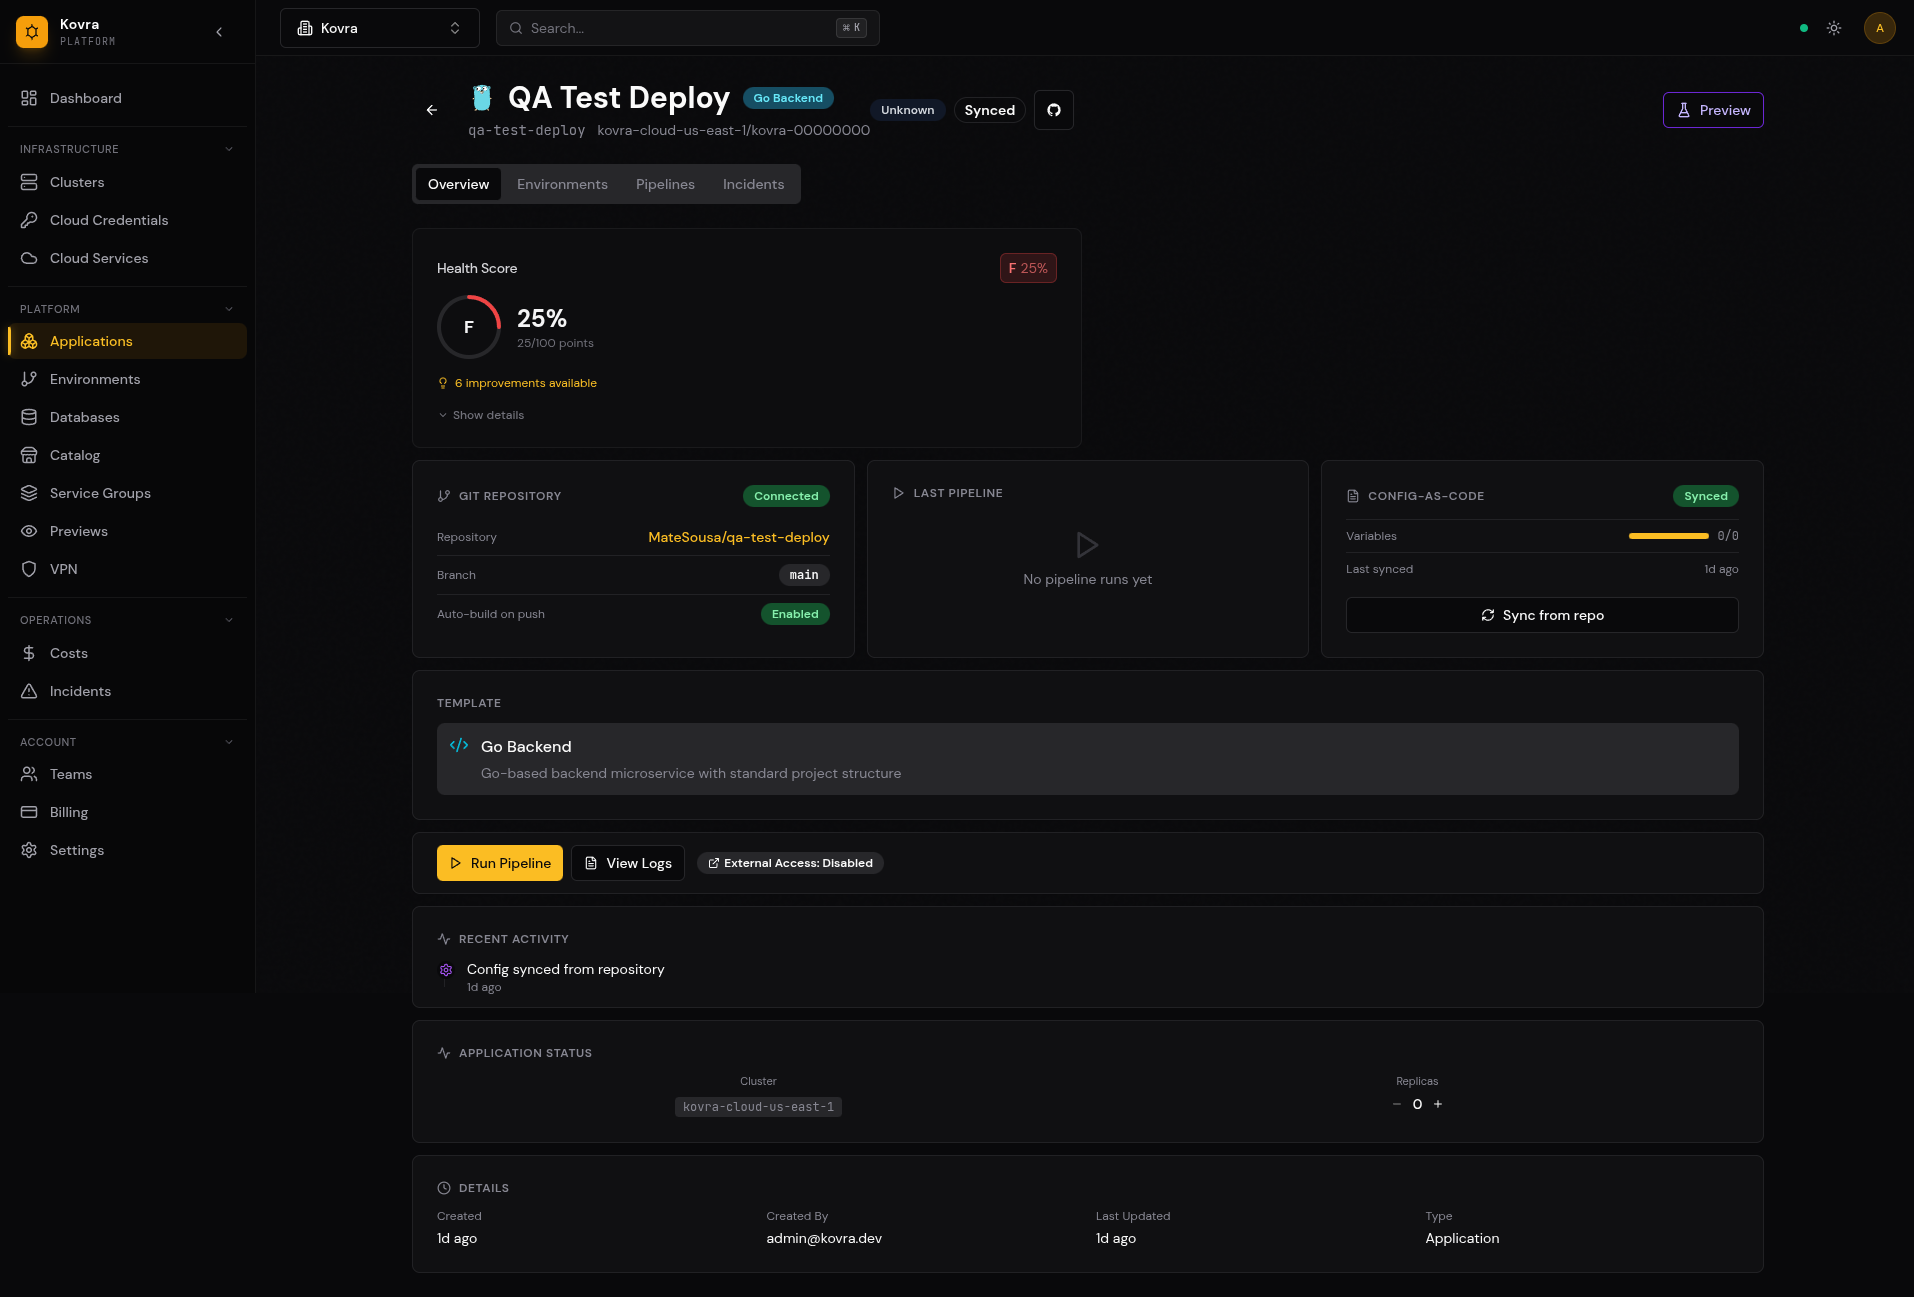
Application Detail Page
Once your application is created, you can view its details, including health score, Git repository status, deployment pipeline, and configuration.
Environment Variables and Secrets
Applications can be configured with environment variables that are injected at runtime.
Managing Variables
Navigate to your application’s Environments tab, select an environment, and click Variables.
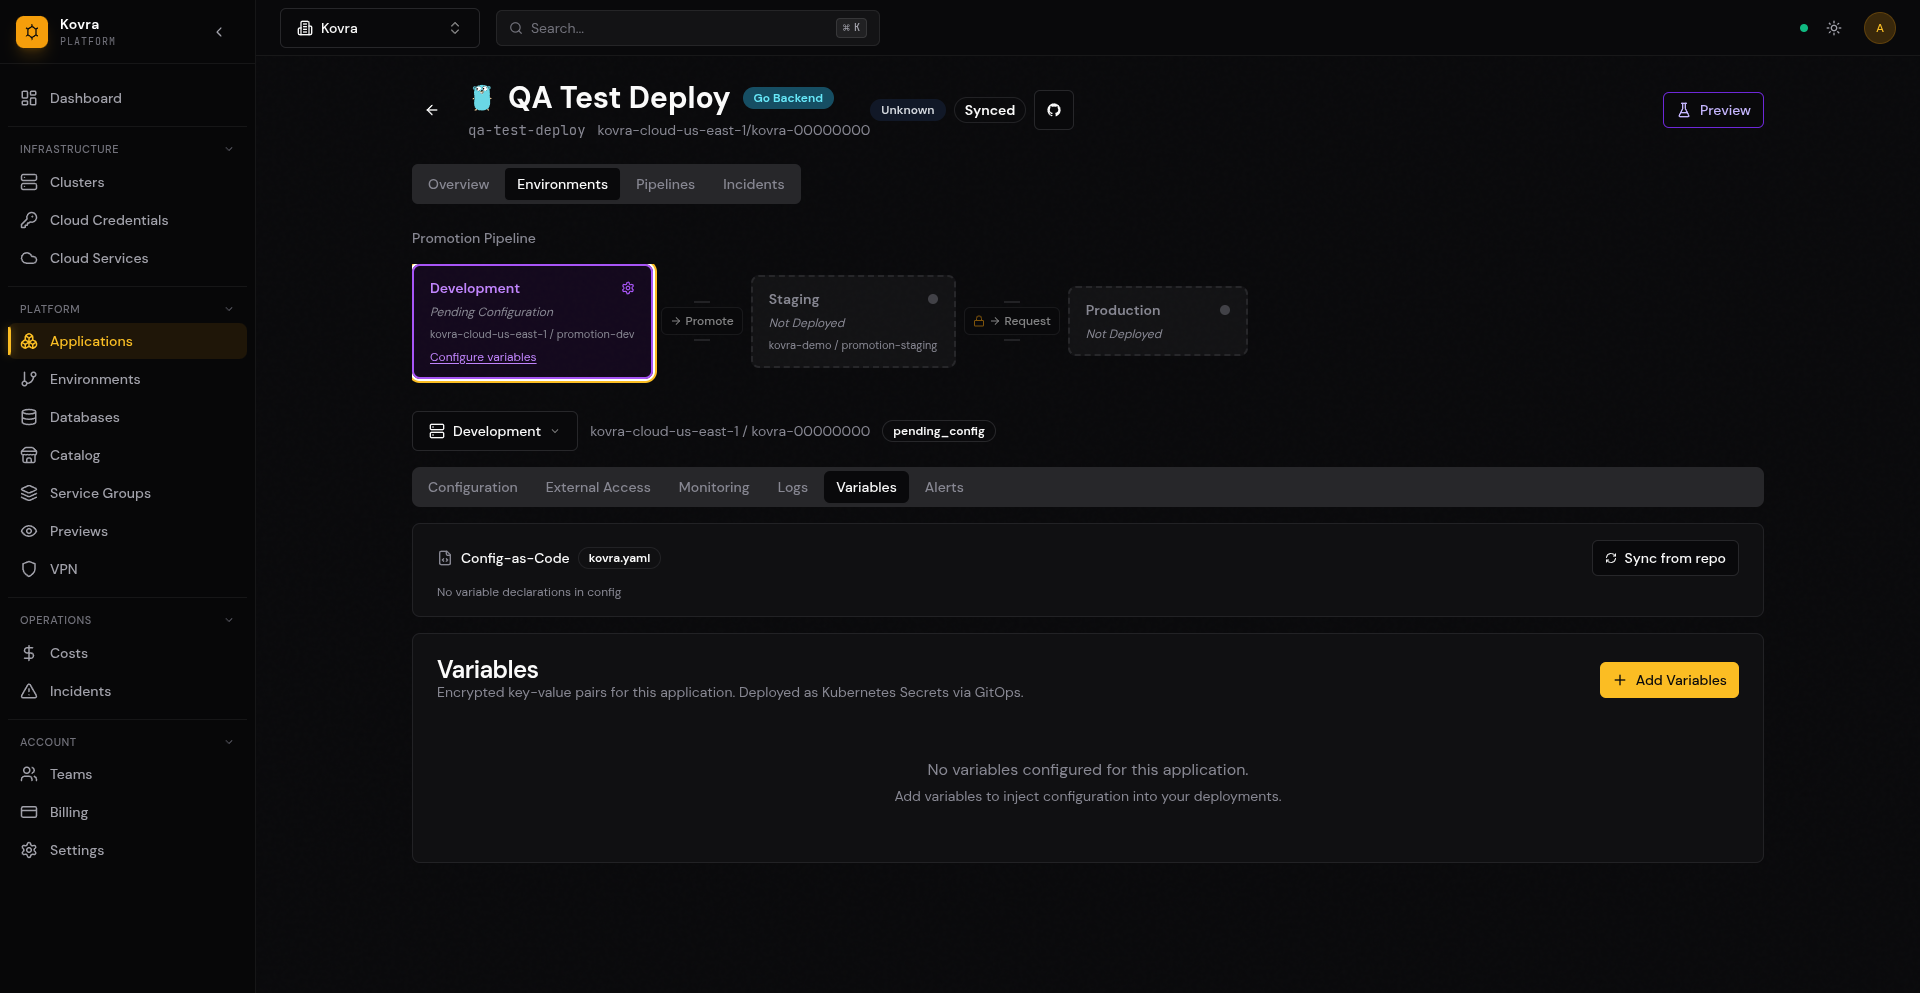
Variable Types
- Plain variables — Visible in logs and configuration
- Secret variables — Encrypted at rest using AES-256-GCM, masked in the UI
Adding Variables
- Click + Add Variables on the Variables tab
- Enter the key name (e.g.
DATABASE_URL) - Enter the value
- Toggle Secret if the value should be encrypted and masked
- Click Save and trigger a redeployment to apply changes
Custom Domains and TLS
Platform URL
Every application gets a platform-managed URL automatically. You can find it on the External Access tab of your environment.
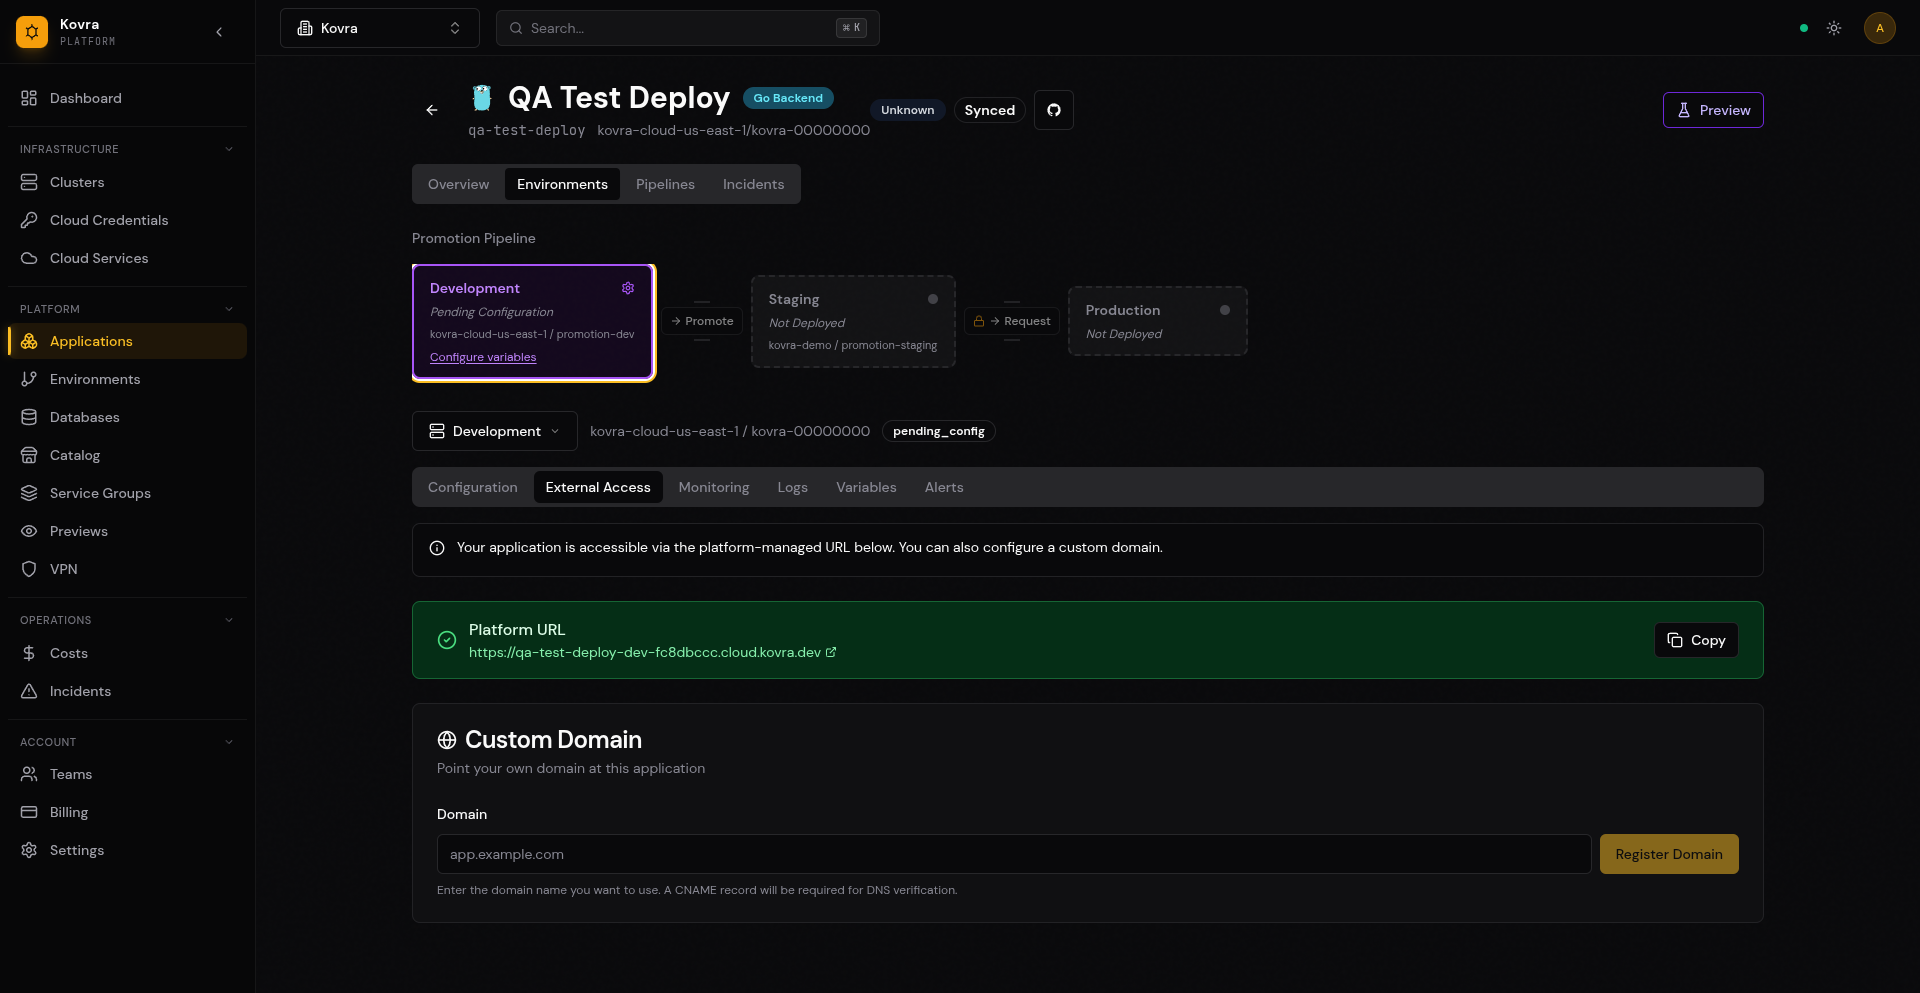
Enabling a Custom Domain
To use your own domain:
- Navigate to your application’s Environments tab
- Select the environment and click External Access
- Enter your custom domain in the Custom Domain field
- Click Register Domain
- Configure a CNAME record pointing your domain to the platform’s load balancer
- Verify DNS propagation
TLS Certificates
TLS certificates are automatically provisioned via cert-manager with DNS-01 challenge validation. No manual certificate management is required.
Public vs Private Access
Kovra Cloud applications support two access modes:
Public Access (Default)
The application is accessible from the internet via its assigned domain or custom domain. Public access is available on all plans.
Private Access (Business and Enterprise Cloud)
The application is only accessible via the organization’s WireGuard VPN tunnel. This is ideal for:
- Internal tools and admin panels
- Backend services that should not be internet-facing
- Staging environments
To use private access:
- Enable VPN for your tenant (see VPN / Private Access)
- Set the application’s access mode to
private
Note: Private access requires a Business or Enterprise Cloud plan.
Viewing Deploy History and Logs
Pipelines
Each deployment creates a pipeline record. View deployment history on the Pipelines tab.
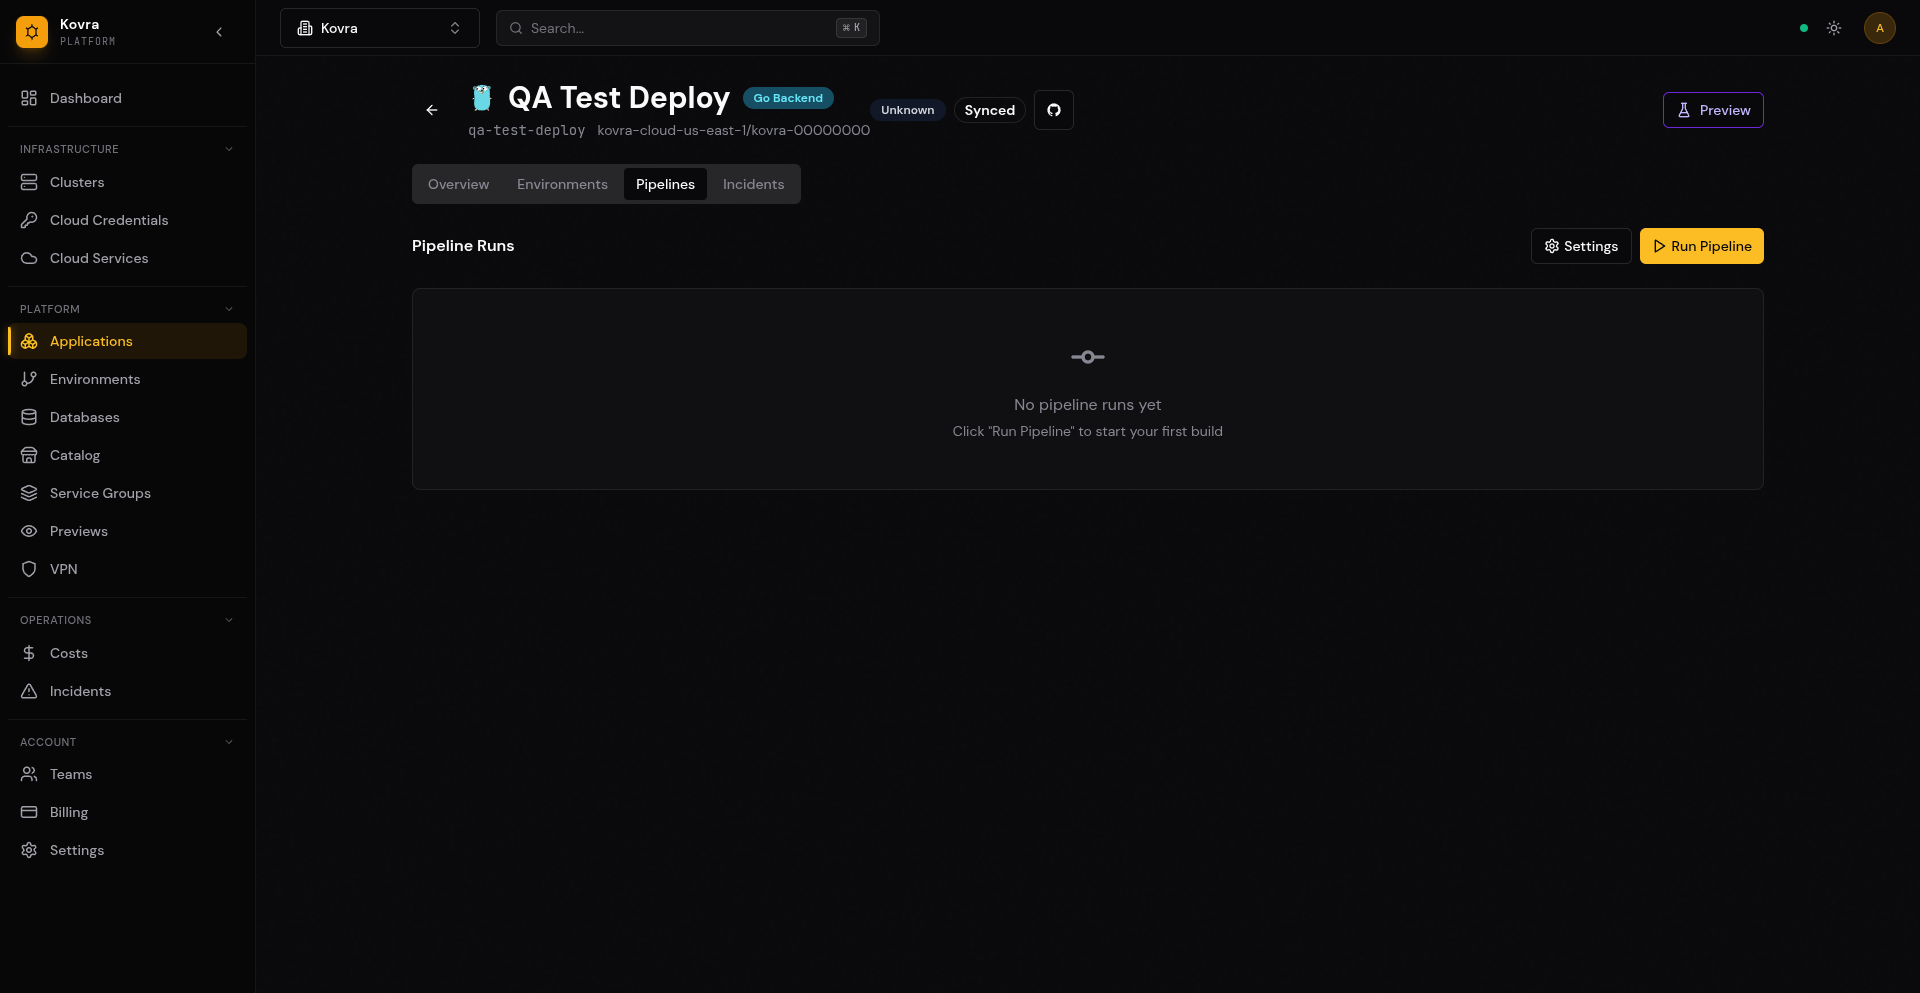
Triggering a Redeployment
To manually trigger a new deployment, click Run Pipeline on the application’s overview page or on the Pipelines tab.
Canceling and Retrying Deployments
On the Pipelines tab, you can cancel an in-progress pipeline or retry a failed one using the action buttons on each pipeline run.
Application Configuration
Updating Configuration
Navigate to the Environments tab, select an environment, and click the Configuration sub-tab. From there you can adjust:
- Replicas — Number of running instances
- Resources — CPU and memory allocation
- Port — The port your application listens on
- Health check path — The endpoint used for liveness/readiness probes
Catalog Updates
If your application was created from a catalog template, Kovra will notify you when a newer version is available. You can check for and apply updates from the application’s overview page.
Next Steps
- Managed Databases — Connect your app to a managed database
- VPN / Private Access — Configure private access for your app